UI programing in IOS can be simple, yet is a little rough at the same time. I’ve been working in WPF for the past couple of years, and I prefer it to any other UI framework I’ve tried. It’s one of those things Microsoft got right. With WPF you do most of your work in markup; the designer is rarely used because the relative layout of controls can make the design view an approximation at best. From what I’m finding out with Xcode, is that, in the Mac development world, the designer view is still king.
The Xcode way of defining UI’s is much more like the old Win Forms way of doing things. It does enforce some better View-Model-Controller conventions than Win Forms did out of the box, but you are going to be doing most of your work in the designer. The UI is also geared more towards absolute positioning. This isn’t as much as a detriment as I thought at first. IOS devices are all a fixed size, so the need for a scalable UI is less important than in a desktop environment. (The ui builder does have constraints that let you do relative positioning, but they can be rather byzantine and out of scope for this post.)
Views and Controllers
When you create your IOS project, you’ll get a few default files included. One of these is the storyboard. This is where you’ll define all the views in your app. Larger applications may use more than one storyboard, but for now we’ll stick to one. 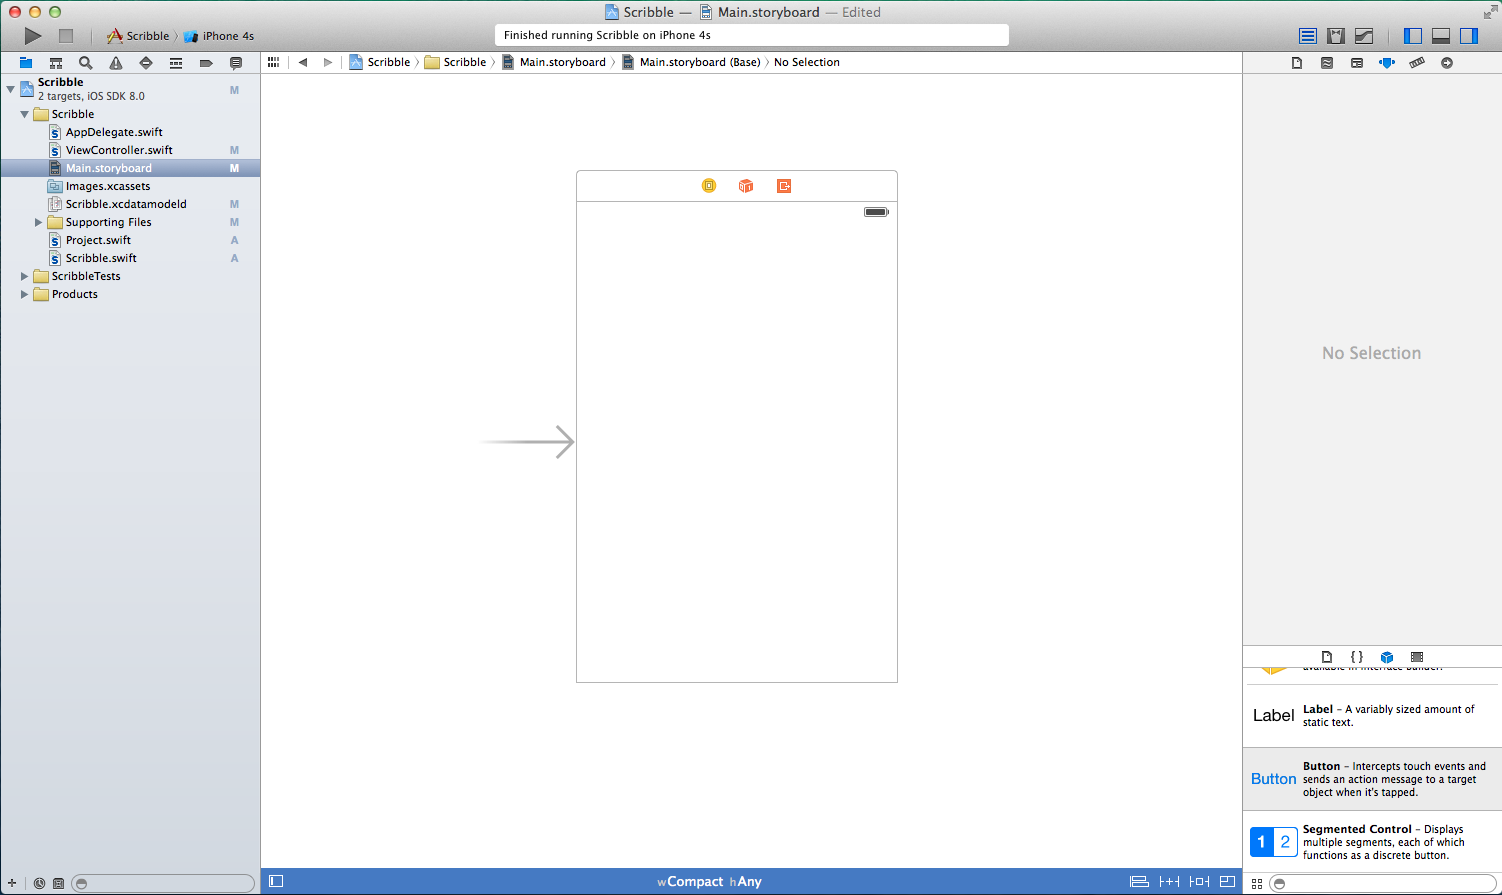 Initially your storyboard will be populated with a default setup depending on the type of project you created. Here we have a simple one screen app. On the bottom of the right hand side you have your object library. From here, you drag in any controls or additional views you need. Right above it is the inspector. It’s much like the properties panel in Visual Studio. It has six tabs, but the center two-the identity and attributes tabs-are the the ones you’ll be needing the most. The gray arrow indicates the initial view of the storyboard.
The first thing we need to do with our view is hook it up to a controller class. The controller class will handle all the programatic interaction with the view. To do this we first create a new Cocoa class that inherits from UIViewController. I’m going to create one called “ScribbleViewController”. To link the view with the controller, we open up the storyboard again, and select our view. In the Identity tab of the inspector, there is a Custom Class drop down. Inside that drop down, one of the options will be the class you just created. 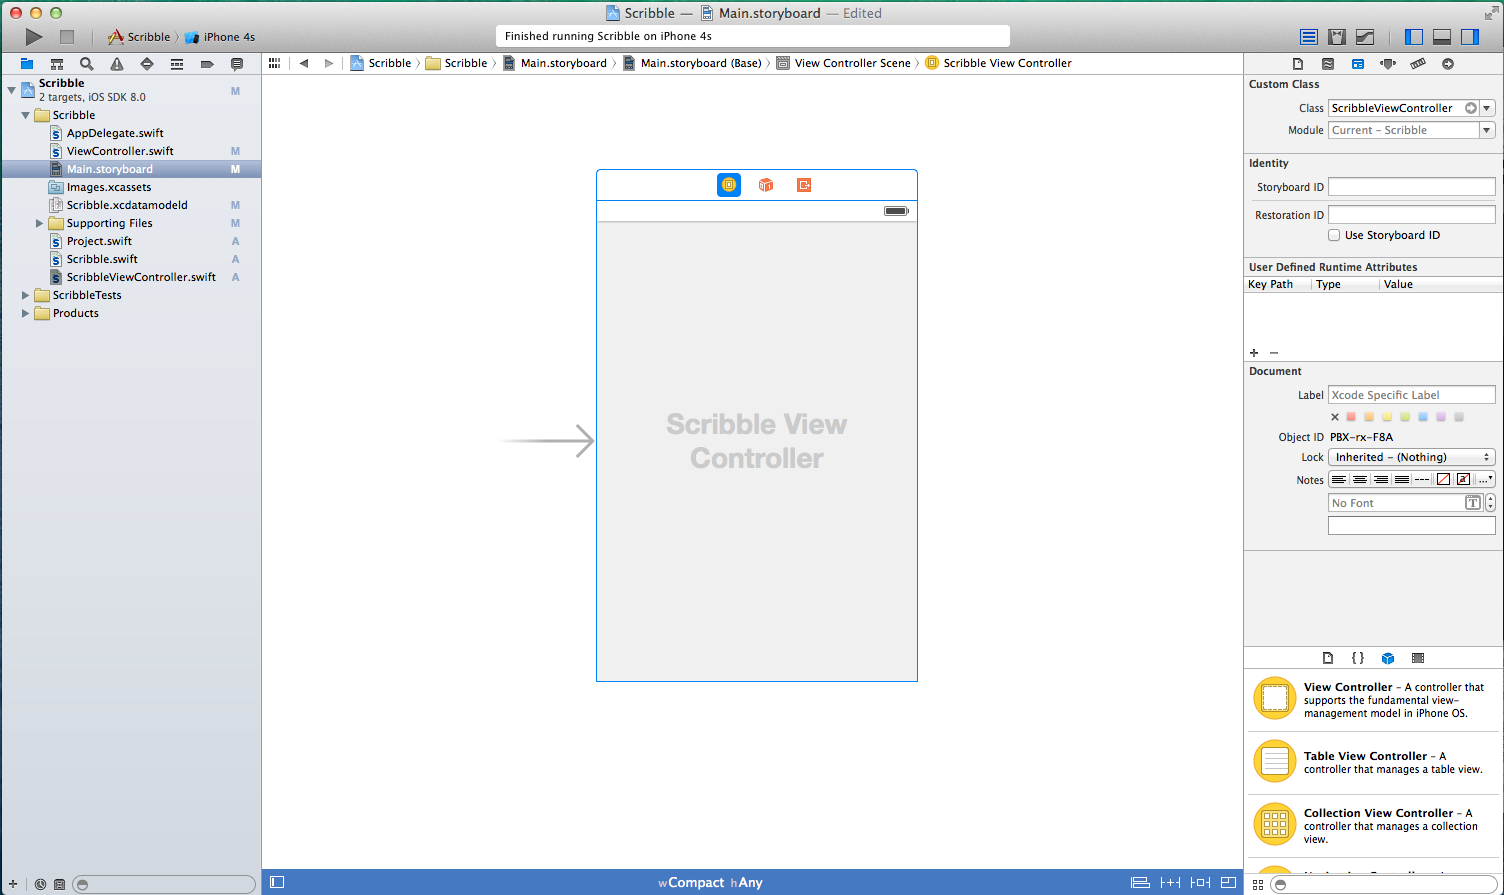
Controls
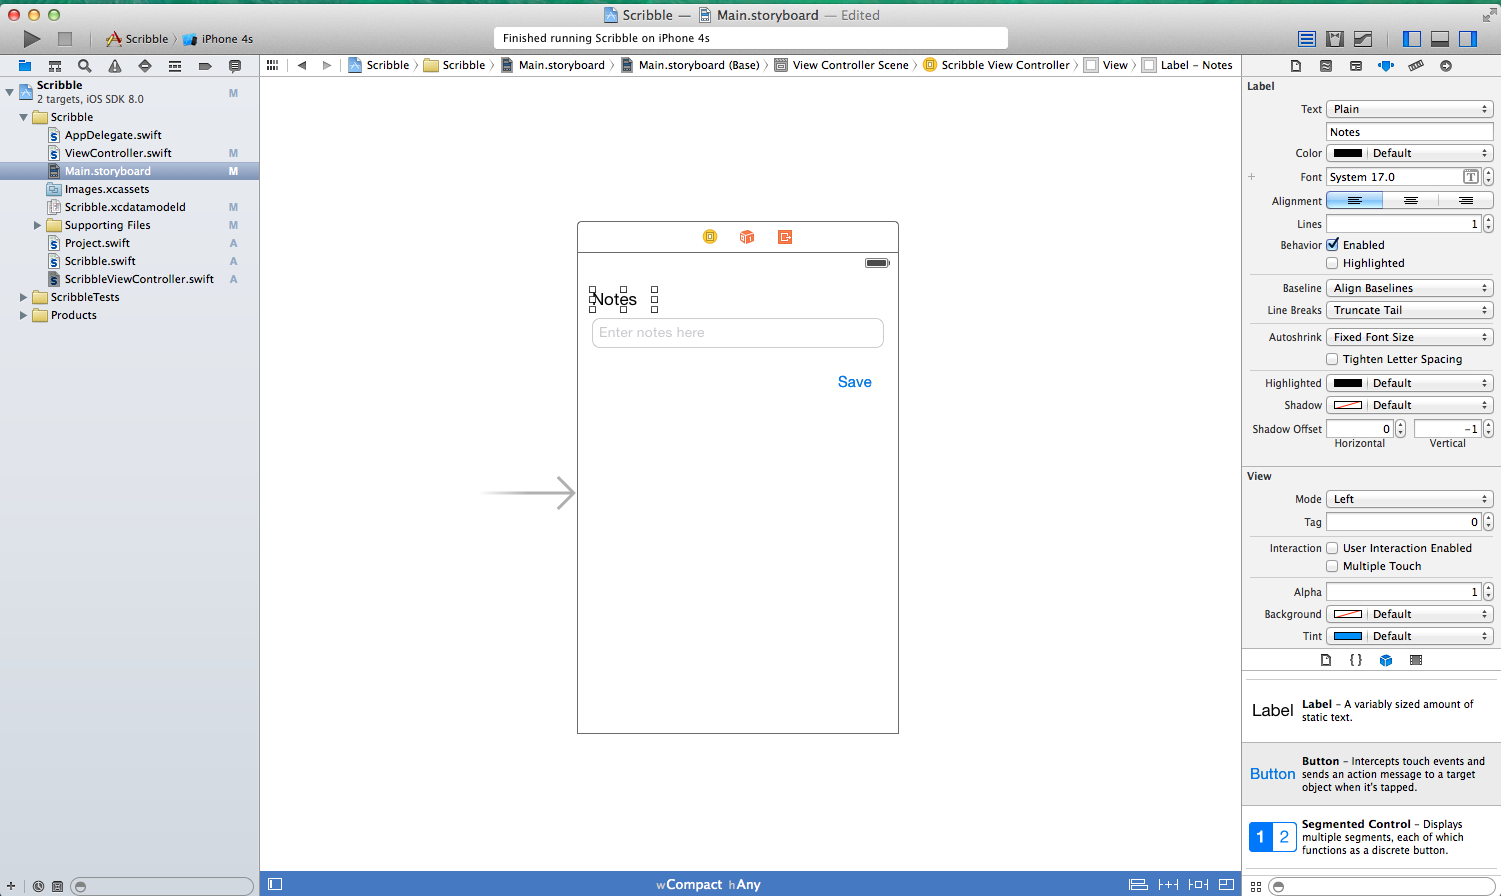
Now that we have a code behind for our view, lets add some controls. I’m going to add a label, a text field, and a button. You can use the Attributes tab of the inspector to set up some initial visual values.
Now that we have some controls, we need to wire them up in our controller. This requires us to create outlets and actions. I’ll need an outlet for my text field to get the input from it. This requires adding the @IBOutlet attribute to the field I want to use as a reference. I’ll need a action for the user clicking the save button as well. The @IBAction attribute marks a function as a valid target for a control generated UI event.
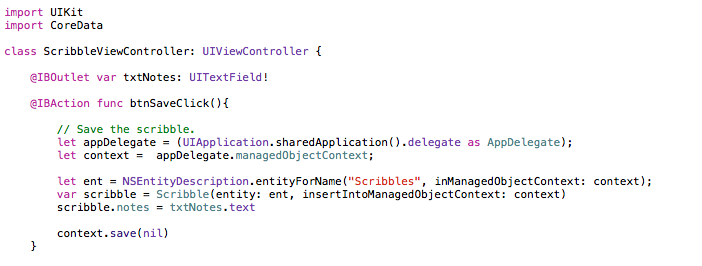
Notice that the text field handle is an implicitly unwrapped optional. I’m trusting that UIKit will set the property for me.
There’s one more piece to get this working. We need to make sure the controls in the storyboard know what they map to in the controller. We have to go back to the storyboard and point the text field to the controller field we created for it, and we need to link up our click handler. First we’ll right click on the text field. You’ll get a pop-up with a list of options. Each one has a little dot on the right hand side. Find the one labeled “New Referencing Outlet” and drag from the small circle to the left most icon at the top of your view.

When you release the drag, you’ll get another small popup. This one will list the valid targets to reference. You should see your txtNotes field in the list.
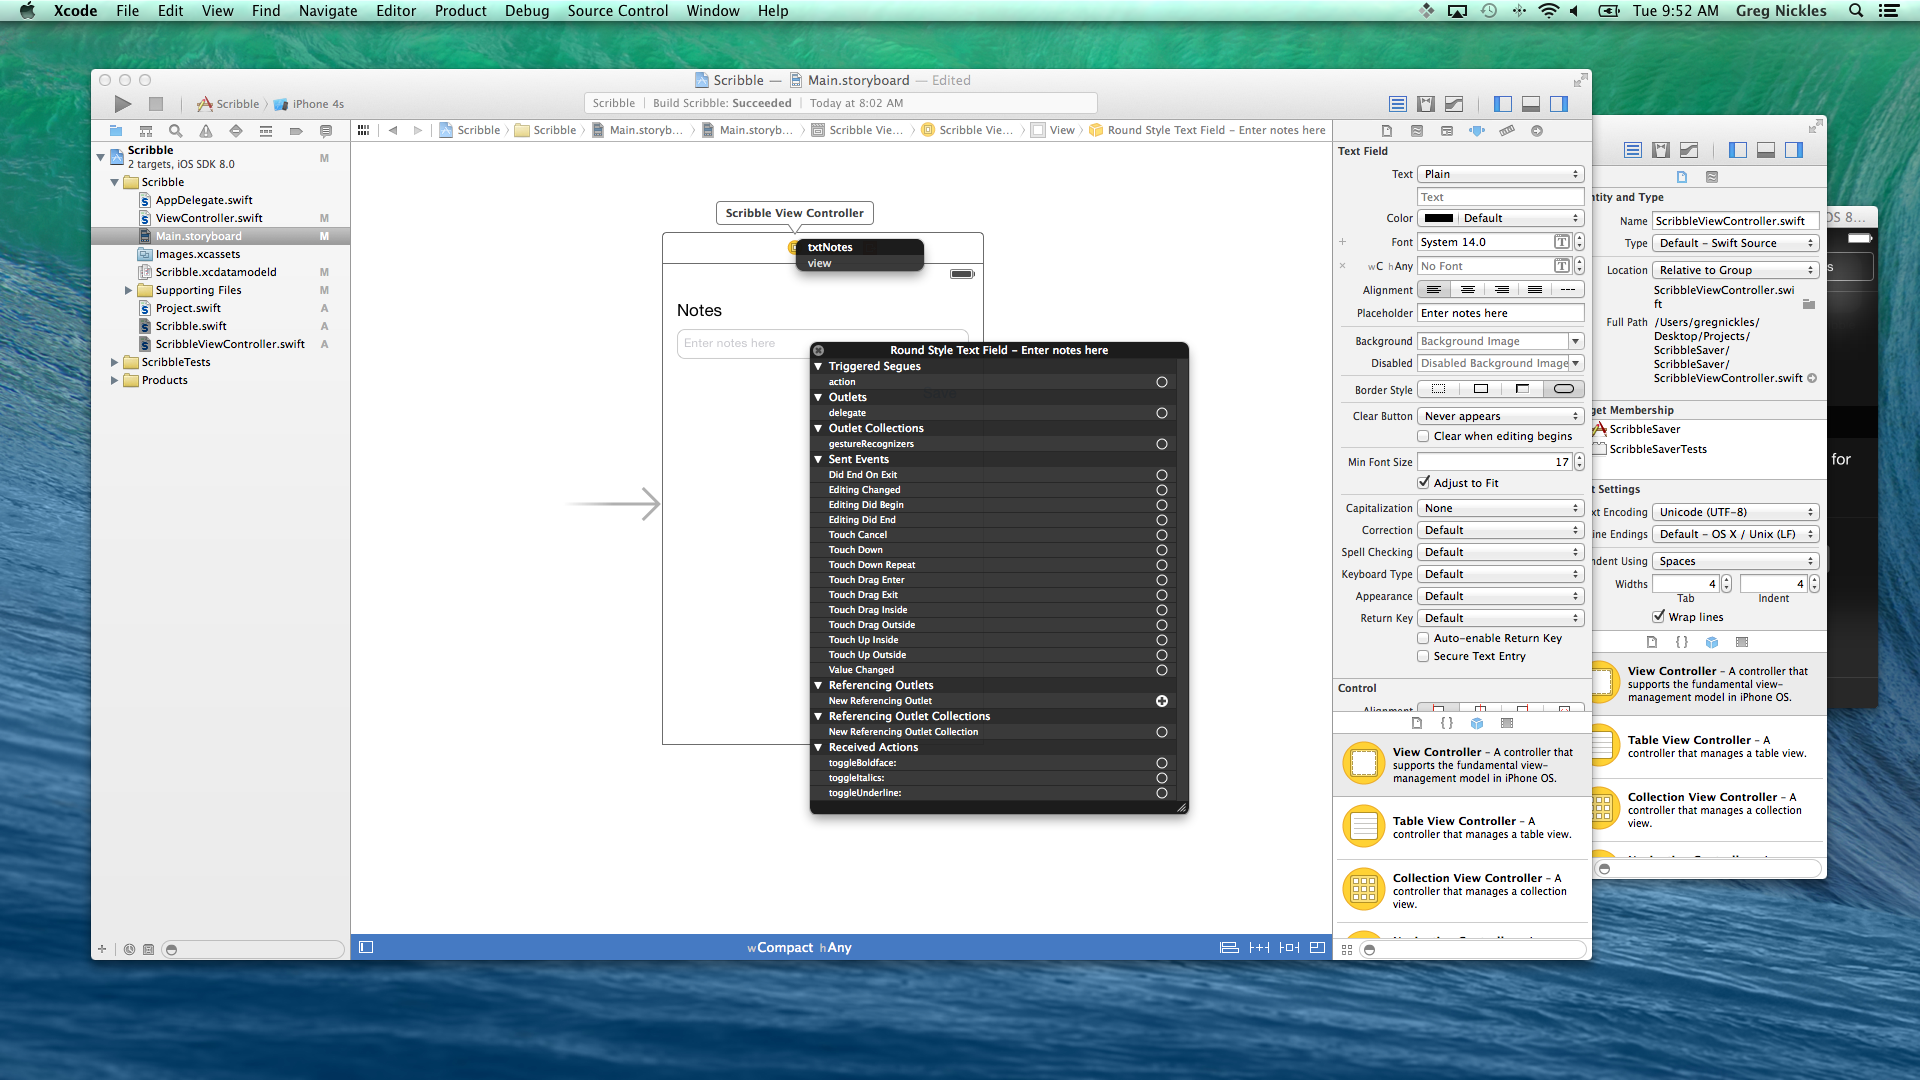 Select it, and your control is now linked from the view to the controller. Linking the Save button is similar, but instead of “New Referencing Outlet”, you want “Touch Up Inside”. When you drag to the View Controller icon, you will then see a list of valid actions to call when the button is pressed.
Delegates
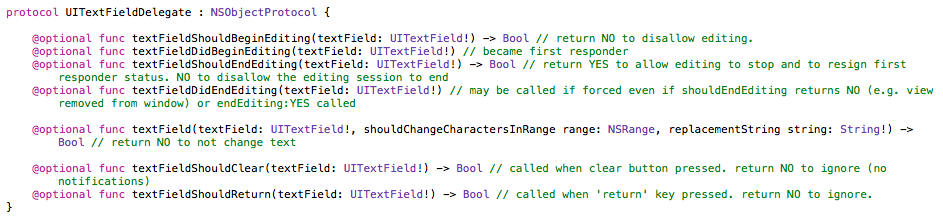
Some controls require a bit more complex interaction than just handling a single button press. For this reason, most controls have a delegate protocol defined for them. So, say we want to have some more fine-tuned interactions with our text field in order to better present and hide the on-screen keyboard. We would go to our controller and add the UITextFieldDelegate protocol to its declaration. This protocol contains many optional methods to better programmatically interact with the text field.
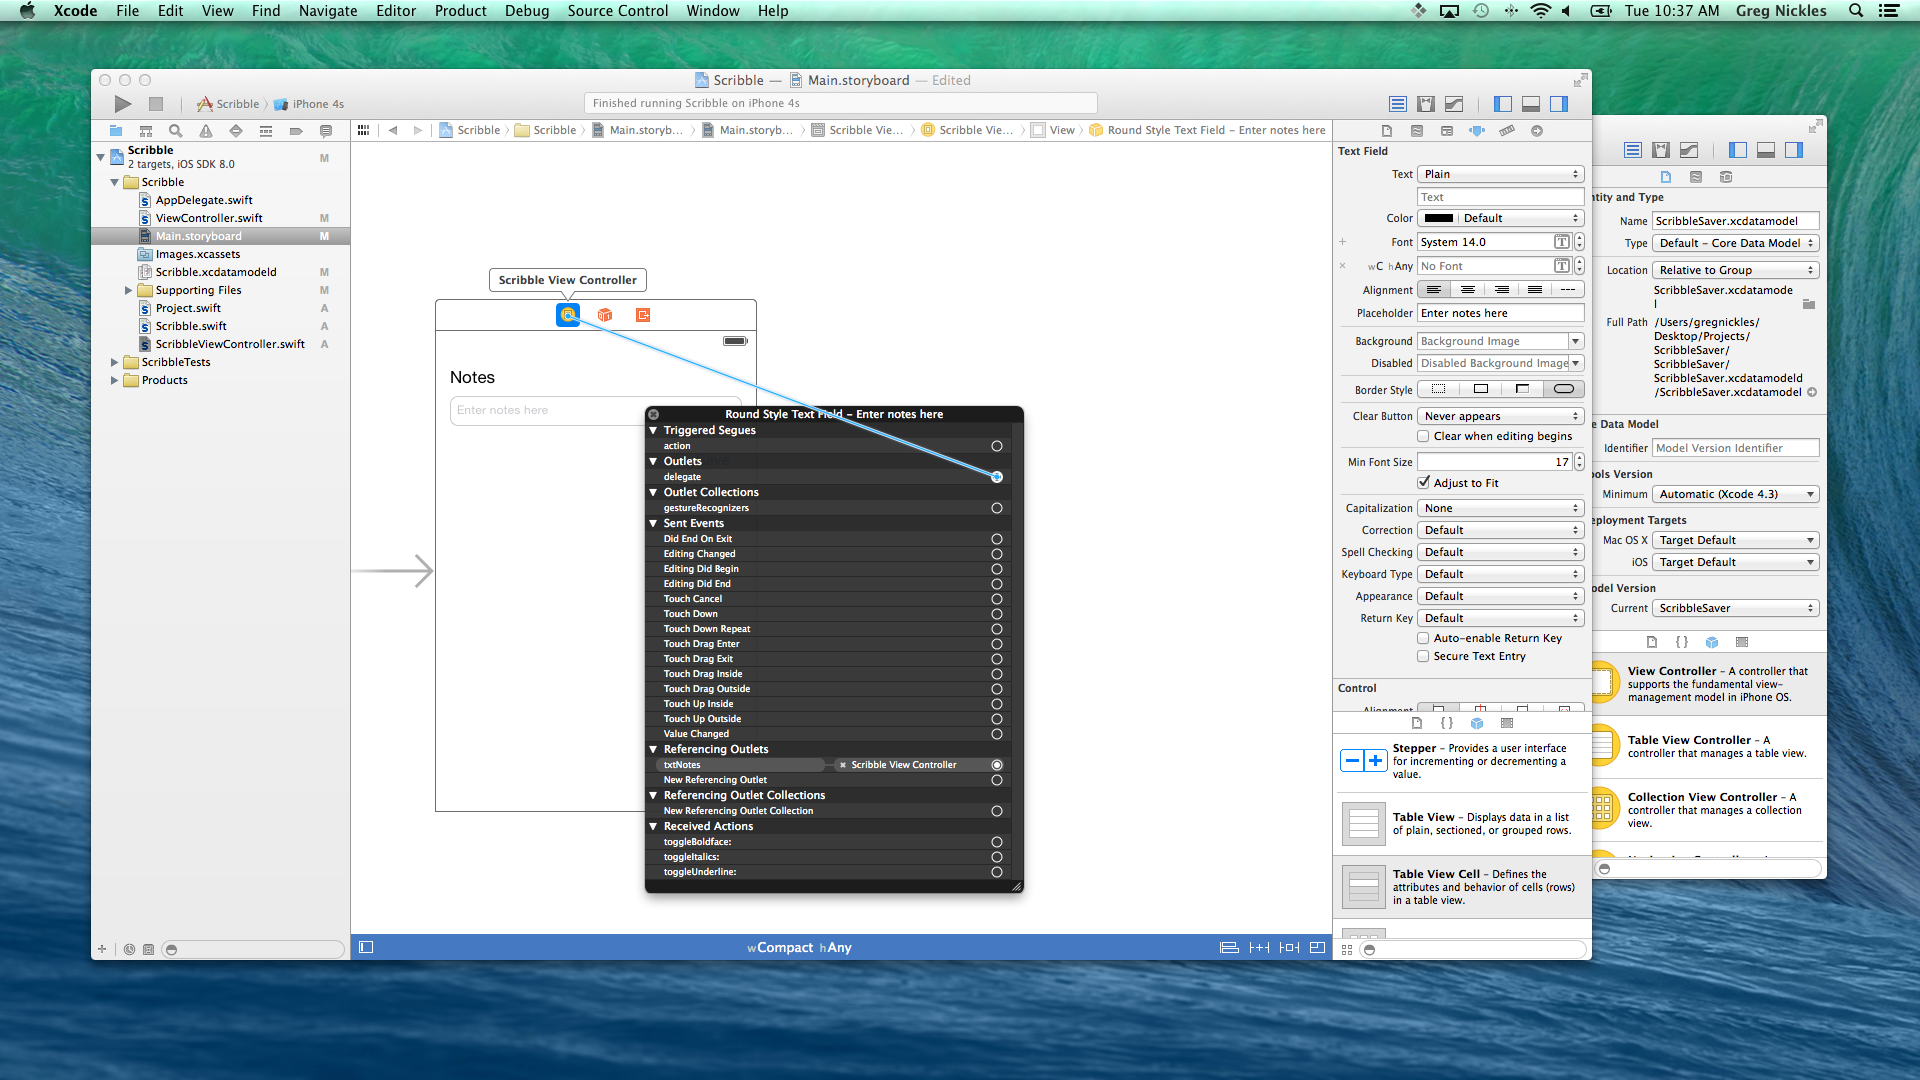
 These delegates are wired up just like a referencing outlet. Drag the dot next to “delegate” up to the View Controller icon.
 Now I can implement any of these optional functions in my controller.

I do wish there was a bit more convention over configuration involved. It’s not the best framework design I’ve used, but with Swift over Objective C, the process is much more bearable. Next time I’ll get into multiple views and how navigate between them.
