
But wouldn’t it be cool if it did this?…
I’ve thought these words to myself many times during my career in software development, specifically in mobile development. I want a product to do more than simply function properly; I want it to look good when it does it. That’s not to say that I’m looking for every app to have more explosions, sound effects, and lens flares than a Michael Bay film, but iOS work seems to have this unwritten rule that the app at least has to look good, and as my confidence with Swift increases, so does my desire to explore the realm of pizazz.
When brainstorming ideas for implementing a project, I am guilty of suggesting ideas that are little over the top. What if you could just step on your phone and it would tell you your weight? What if tapping on that ruler image was a mechanism for inputing the size? What if sparks flew from the “fire” button as you pressed it?
These types of questions get me excited about a project and sometimes initiate some creative conversation about the product. But while reflecting on one such discussion, I thought to myself, Are these ideas really that ridiculous? I could feel my growing iOS confidence shaking hands with my creativity and the thought entered my head:
Let’s learn animation.
I found some tools online to help me learn how to use Swift for animation and implemented some basic animations. Here is a little tutorial of my own for how to give something a little pizazz.
Let’s say you are making an app for an amusement park and you are adding a landing screen for the water park. This page is the first thing people who are thinking about attending the waterpark are going to see, and you want to grab their attention. Because it’s a water park, let’s make the page have some bubbles in the background that float from the bottom of the screen up towards the top. No explosions, no sound effects, just bubbles.
Let’s do this.
Create a New Project
First, open up Xcode and create a new project. You will notice that one of the options says “Game” and if you were to choose that, it would do some of these initial steps for you, but we aren’t making a game, our scenario is that we already have an app in place and we want it to have a bit of animation on one screen. So let’s choose “Single View Application”. Because this is a tutorial for an amusement park app, let’s give our project a cheesy name like “AnimationIsland.”
Open up Main.storyboard and you’ll see something like this:
Let’s get our ViewController ready for some sick animation. We want to use some of the SpriteKit tools that Apple provides us with, but in order to do so, we need to have an SKView in our ViewController rather than a UIView. In the list on the left side of the interface builder, select “View”. On the right side of the screen under the “Identity Inspector” tab, change the class of our view to an SKView:

Setting the Scene
Now create a new “Swift file” in the “AnimationIsland” Folder. Name it “AnimationScene”
In that file, replace the bit of code they give you with this:
import SpriteKitclass AnimationScene: SKScene { var animationBackground: SKSpriteNode! required init?(coder aDecoder: NSCoder) { fatalError("init(coder:) has not been implemented") } override init(size: CGSize) { super.init(size: size) anchorPoint = CGPoint(x: 0, y: 1.0) } override func update(_ currentTime: CFTimeInterval) { }}Our class is of type “SKScene”. Think of an SKScene as a movie scene. A TV has a screen that displays scenes from a movie, and these scenes have actors and scenery and such.
- Our ViewController is like the TV
- The SKView is like the TV screen
- The SKScene is like a movie scene
- SKNodes are like actors and scenery
So if we follow this analogy: A ViewController has an SKView that displays SKScenes, and these SKScenes have SKNodes.
Let’s talk about the code. The “required init” is a requirement of inheriting from SKScene. Xcode will add that for you if you don’t manually type it. The second initializer takes a size and uses that as the size for our scene and sets the anchor point to be the top left of the scene. (0,0) means bottom left for the anchor point, (1,1) means top right, so (0,1) is the top left. Update is a function from SKScene that is called before each frame. We will make good use of that later.
ViewController.swift
First, let’s get our ViewController to show this empty scene. Open up our ViewController.swift file and make the following changes.
import UIKitimport SpriteKitclass ViewController: UIViewController { var scene: AnimationScene! var size: CGSize! override func viewDidLoad() { super.viewDidLoad() size = self.view.frame.size scene = AnimationScene(size: size) let skView = self.view as! SKView skView.presentScene(scene) }}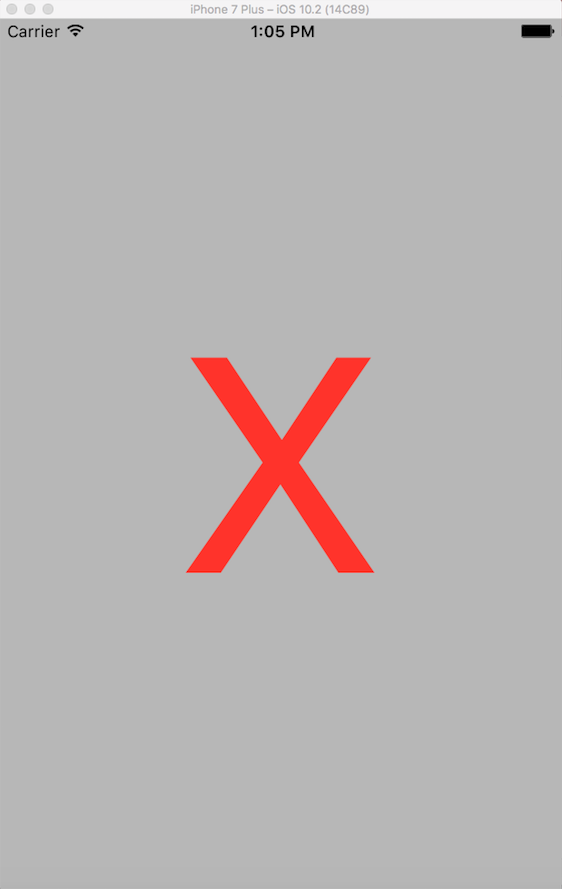
Once again, we have to import SpriteKit to use things like SKView. The variable “scene” holds an instance of the “AnimationScene” class we just created and sets it’s size to be the size of the screen. Because we set the class of our ViewController’s View to SKView earlier, we can now downcast it as an SKView and use it to present our empty scene.
If you run the application at this point, the screen should turn to a dark gray like the screen shown on the left. That means we are displaying the scene. (note: the check mark should not appear)
AnimationScene.swift
Great, now all we need are some SKNodes. Switch back to our AnimationScene.swift file.
We’re going to add a bunch of code and then talk through it all, so bear with me.
import SpriteKitclass AnimationScene: SKScene { var animationBackground: SKSpriteNode! required init?(coder aDecoder: NSCoder) { fatalError("init(coder:) has not been implemented") } override init(size: CGSize) { super.init(size: size) anchorPoint = CGPoint(x: 0, y: 1.0) animationBackground = SKSpriteNode(color: UIColor.blue, size: size) animationBackground.anchorPoint = CGPoint(x: 0, y: 1.0) animationBackground.position = CGPoint(x: 0, y: 0) self.addChild(animationBackground) } override func update(_ currentTime: CFTimeInterval) { addBubble() floatBubbles() removeExcessBubbles() } func addBubble() { let bubble = SKSpriteNode(color: UIColor.white, size: CGSize(width: 10, height: 10)) animationBackground.addChild(bubble) let startingPoint = CGPoint(x: size.width/2, y: (-1)*size.height) bubble.position = startingPoint } func floatBubbles() { for child in animationBackground.children { let xOffset: CGFloat = CGFloat(arc4random_uniform(20)) - 10.0 let yOffset: CGFloat = 20.0 let newLocation = CGPoint(x: child.position.x + xOffset, y: child.position.y + yOffset) let moveAction = SKAction.move(to: newLocation, duration: 0.2) child.run(moveAction) } } func removeExcessBubbles() { for child in animationBackground.children { if child.position.y > 0 { child.removeFromParent() } } }}animationBackground
That dark gray color isn’t fitting for such a glorious water park landing page. Let’s make the background blue because, you know, water. Remember, SKNodes are not just actors, but scenery too. Make sure you declare animationBackground as a field for the class so we can add other nodes to it later. We initialize it as an SKSpriteNode which is a subclass of SKNode. A sprite node can be initialized with a custom texture that you have or a color and it makes a square of size size of that texture/color. Make it the size of the whole screen and set its anchor point to the top left of the node (0,1) and then set its position to (0,0). In terms of position, (0,0) is the point at the top left of the screen, so we are essentially putting the top left corner of the background node (anchor point) at the top left corner of the screen (position). Lastly, add the background as a child of the Scene, so the scene will display it.
update
Update is called before each frame is displayed. Before every frame, we will add a bubble to the screen, float all of the bubbles a little closer to the top of the screen, and then remove any bubbles that have reached the top of the screen.
addBubble
To add a bubble, we create a 10×10 white square as an SKSpriteNode and add it as a child of the background node. We set its position to the middle of the bottom of the screen. The bottom right corner of the screen is (size.width, (-1)*size.height).
floatBubbles
To cause the currently displayed bubbles to float toward the top, we will add 20 to their y position every frame. In order to make their paths look more random and “bubble-like” lets make their x position vary by adding a random number between -10 and 10. Then for every bubble, we create an SKAction to tell our bubble node to move to the new location and tell our bubble to run that action. SKActions are how you tell your nodes to move, resize, remove themselves, etc…
removeExcessBubbles
If we don’t remove our bubbles after they reach the top of the screen, our app will be brought to its knees trying to calculate the new positions for our army of ever-multiplying bubbles. We don’t want that, so when a child reaches a y position of 0, we remove it from the scene.
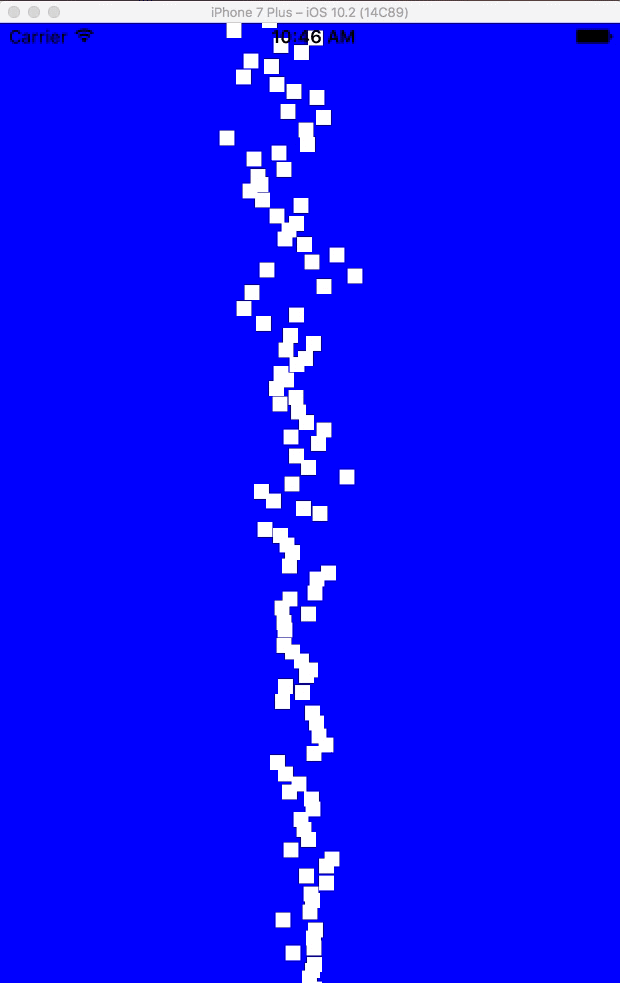
Now, run your app and witness the floating glory of square bubbles rising to the heavens.
Well that’s pretty cool isn’t it? Now get creative! You could use an SKShapeNode instead of an SKSpriteNode to make the bubbles circles instead of squares, you could make them start at different x positions, you could make them have random sizes, you could make them pop when you touch them, or you could give them random paths. The possibilities are endless, but hopefully this will get you started with the basics of Swift animation and a little knowledge on what the important pieces are. Now go and add a little pizazz to the world.
The source code is located at https://github.com/JoeCoy/AnimationIsland
